Stuck staring at a blank canvas when Generative Fill should be working its magic in your Photoshop, especially if you’re navigating the quirks of a non-official setup? You’re not alone. Users frequently hit roadblocks when trying to harness this powerful AI feature, often encountering messages like "Generative Fill not available," unexpected errors, or simply no output at all. This guide cuts through the confusion, offering clear, actionable steps to diagnose and resolve common 'Generative Fill Not Working' errors, getting you back to effortless content creation.
At a Glance: Your Quick Fix Checklist
- Update Photoshop: Always the first step. Outdated versions often lack features or bug fixes.
- Meet System Requirements: Generative Fill demands a modern OS, ample RAM (16GB+), and a capable GPU.
- Enable GPU: Ensure your Graphics Processor is actively utilized in Photoshop preferences.
- Clear Cache: A cluttered cache can drag down performance and introduce glitches.
- Check Availability: Confirm Generative Fill appears in your context menu after making a selection.
- Reset Preferences: Corrupted settings are often hidden culprits behind odd behavior.
- Layer Compatibility: Make sure you're working on an unlocked, compatible pixel layer.
- Refine Selections: Precise selections yield better, more consistent Generative Fill results.
- Verify Internet Connection: Cloud-based AI features need a stable connection to function.
- Clean Reinstallation: For persistent issues, a fresh install can clear deep-seated problems.
Understanding Generative Fill's Demands: Why It's Picky
Generative Fill, introduced in Adobe Photoshop 2023 and newer, is nothing short of revolutionary. It leverages sophisticated AI engines to intelligently blend, adapt, and extend your images based on textual prompts. Think of it as having a highly skilled digital artist at your fingertips, capable of removing objects, changing backgrounds, or even creating new elements that seamlessly match your photo's style.
However, this magic isn't free. Generative Fill is a resource-intensive feature that relies heavily on both your local system and Adobe's cloud infrastructure. Understanding these core requirements is the first step in troubleshooting any issues you might encounter:
- System Specifications: This isn't your grandma's Photoshop. You'll need at least Windows 10 (64-bit) or macOS Big Sur (11.0) or newer.
- RAM is King: A minimum of 16 GB of RAM is crucial, but 32 GB or more is ideal for smooth performance, especially with larger files.
- GPU Power: A compatible NVIDIA or AMD graphics card with up-to-date drivers is non-negotiable. The GPU handles the heavy lifting of AI computations.
- Internet Connection: Many of Generative Fill’s AI functions are cloud-based, meaning a stable and reliable internet connection is essential for it to communicate with Adobe's servers.
- Photoshop Version: Naturally, you must be running Adobe Photoshop 2023 or a later version. Earlier versions simply don't have the feature.
If your system struggles to meet these benchmarks, Generative Fill might not appear, run slowly, or fail to produce any output. It's like asking a bicycle to win a Formula 1 race—it’s just not built for that kind of performance.
The Root Causes: Why Generative Fill Might Be Failing You
Before diving into solutions, it helps to understand the common scenarios that prevent Generative Fill from working as expected. These usually fall into a few categories:
- Feature Invisibility: Generative Fill simply isn't showing up in the context menu or the Task Bar, making it impossible to use.
- Error Messages: You're greeted with pop-ups indicating a problem, such as "Generative Fill failed to connect," "Could not complete your request," or "Server error."
- No Output: The feature seems to run, but after processing, nothing appears, or the generated content is clearly incorrect or low quality.
- Performance Lags: The process takes an unacceptably long time, or Photoshop becomes unresponsive while Generative Fill attempts to generate.
Identifying which of these you're facing will guide you toward the most relevant troubleshooting steps.
Your Step-by-Step Troubleshooting Toolkit
Let's roll up our sleeves and tackle these issues one by one. Each step is designed to address a specific potential culprit, moving from the most common and easiest fixes to more comprehensive solutions.
1. Photoshop Updates: The First Line of Defense
Adobe regularly releases updates that not only introduce new features but, crucially, fix bugs and improve performance. An outdated Photoshop version is a prime suspect for Generative Fill issues.
How to Fix It:
- Open Adobe Creative Cloud: Launch the Creative Cloud desktop application on your computer.
- Navigate to Apps: In the Creative Cloud app, go to the "Apps" section.
- Find Photoshop: Locate Adobe Photoshop in your list of installed applications.
- Check for Updates: If an update is available, you'll see an "Update" button next to Photoshop. Click it and allow the update to complete.
- Restart Photoshop: Once updated, close Photoshop completely and then reopen it to ensure the changes take effect.
This simple step often resolves a surprising number of glitches and compatibility problems.
2. Are You Meeting the Bare Minimum? Verifying System Requirements
Even if Generative Fill appears to be working, insufficient hardware can cause it to crash, lag, or produce poor results. Double-checking your system against the recommended specifications is crucial.
How to Verify:
- Check Your OS: Ensure you're on Windows 10 (64-bit) or macOS Big Sur (11.0) or later. You can find this in your system settings (e.g., "About" section on Windows/Mac).
- Inspect RAM:
- In Photoshop: Go to
Edit > Preferences > Performance(Windows) orPhotoshop > Settings > Performance(Mac). - Outside Photoshop: Check your system's "About" or "System Information" panel. Aim for 16 GB minimum, 32 GB or more is better.
- Review GPU:
- In Photoshop: The Performance preferences panel will also show your detected GPU.
- Outside Photoshop: Check your system's Device Manager (Windows) or System Information (Mac) for your graphics card details. Ensure your drivers are up-to-date by visiting the manufacturer's website (NVIDIA, AMD).
If your hardware falls significantly short, consider upgrading. While some workarounds might exist for other Photoshop features, Generative Fill is heavily reliant on these specs.
3. Giving Your GPU the Green Light
Your Graphics Processing Unit (GPU) is the powerhouse behind Generative Fill's AI capabilities. If Photoshop isn't effectively utilizing it, performance will suffer, or the feature might not work at all.
How to Configure GPU Settings:
- Access Performance Preferences: Go to
Edit > Preferences > Performance(Windows) orPhotoshop > Settings > Performance(Mac). - Enable GPU: In the "Graphics Processor Settings" section, make sure the checkbox labeled "Use Graphics Processor" is checked.
- Advanced Settings: Click the "Advanced Settings" button. Experiment with the drawing mode:
- Start with "Basic." If Generative Fill works, gradually try "Normal" or "Advanced" for potentially better performance.
- If you're still facing issues, sometimes reverting to "Basic" can stabilize things.
- Update Drivers: This can't be stressed enough. Outdated GPU drivers are a frequent cause of instability. Visit your graphics card manufacturer's website (NVIDIA GeForce Experience, AMD Radeon Software) to download and install the latest drivers.
4. Spring Cleaning: Clearing Photoshop's Digital Dust
Like any complex software, Photoshop accumulates cache files over time. While useful for quick recall, an overloaded or corrupted cache can slow things down, cause unexpected errors, or even prevent features like Generative Fill from operating correctly.
How to Clear Cache:
- Close Open Files: Save and close any open projects in Photoshop.
- Purge Cache: Go to
Edit > Purge > All. This will clear Photoshop's undo history, clipboard, and cache. - Confirm and Restart: Click "OK" when prompted. Then, completely restart Photoshop.
Regularly purging your cache, especially after intense editing sessions or before starting new complex projects, is a good habit to maintain.
5. Is Generative Fill Even There? Checking for Availability
Sometimes the simplest solution is just ensuring the feature is actually accessible in the first place. Generative Fill might not appear if it's not correctly triggered or if there's a minor UI glitch.
How to Check:
- Open an Image: Load any image into Photoshop.
- Make a Selection: Use any selection tool (e.g., Lasso Tool, Marquee Tool, Quick Selection Tool, or Object Selection Tool) to select an area of your image.
- Look for the Contextual Task Bar: The contextual Task Bar should appear automatically with "Generative Fill" as an option.
- Right-Click (Alternative): Alternatively, with an active selection, right-click on the canvas. In the context menu that appears, look for "Generative Fill."
If it doesn't appear, it points to a deeper issue, potentially with your Photoshop installation or preferences. If you're looking for more details on getting it up and running, consider checking out this guide on how to activate Generative Fill.
6. A Fresh Start: Resetting Photoshop Preferences
Corrupted preference files can cause all sorts of inexplicable glitches, from interface issues to feature malfunctions. Resetting them can often resolve persistent problems by giving Photoshop a clean slate.
How to Reset Preferences:
- Close Photoshop: Ensure Photoshop is completely shut down.
- Use Keyboard Shortcut: While starting Photoshop, immediately hold down
Ctrl + Alt + Shift(Windows) orCmd + Option + Shift(Mac). - Confirm Deletion: You'll be prompted with a dialog box asking, "Delete the Adobe Photoshop Settings file?" Click "Yes."
- Reconfigure Basic Settings: Photoshop will launch with default preferences. You'll need to re-configure any custom settings you had, such as memory allocation in
Preferences > Performance.
This is a powerful troubleshooting step, but remember it will erase all your custom settings, workspaces, and tool presets.
7. Layer Up: Ensuring Compatibility
Generative Fill, like many advanced Photoshop features, can be particular about the type of layer it's operating on. Certain layer types or locked layers can prevent it from working.
How to Ensure Layer Compatibility:
- Unlock Layers: Check your Layers panel. If your layer has a padlock icon, it's locked. Click the padlock icon to unlock it, or double-click the background layer to convert it to a standard pixel layer.
- Convert to Pixel Layer: Generative Fill works best, and sometimes exclusively, on standard pixel layers. If you're working with:
- Smart Objects: Right-click the Smart Object layer and choose "Rasterize Layer."
- Vector Masks/Shape Layers: Convert them to pixel layers (e.g., create a new layer, select your vector mask, fill it, then delete the original vector layer).
- Adjustment Layers: Generative Fill cannot directly modify adjustment layers. Flatten the image or work on a separate pixel layer beneath the adjustment layer.
- New Empty Layer: Sometimes, making a selection on a transparent pixel layer and then applying Generative Fill can yield results when working with complex compositions, letting the AI generate content on its own layer.
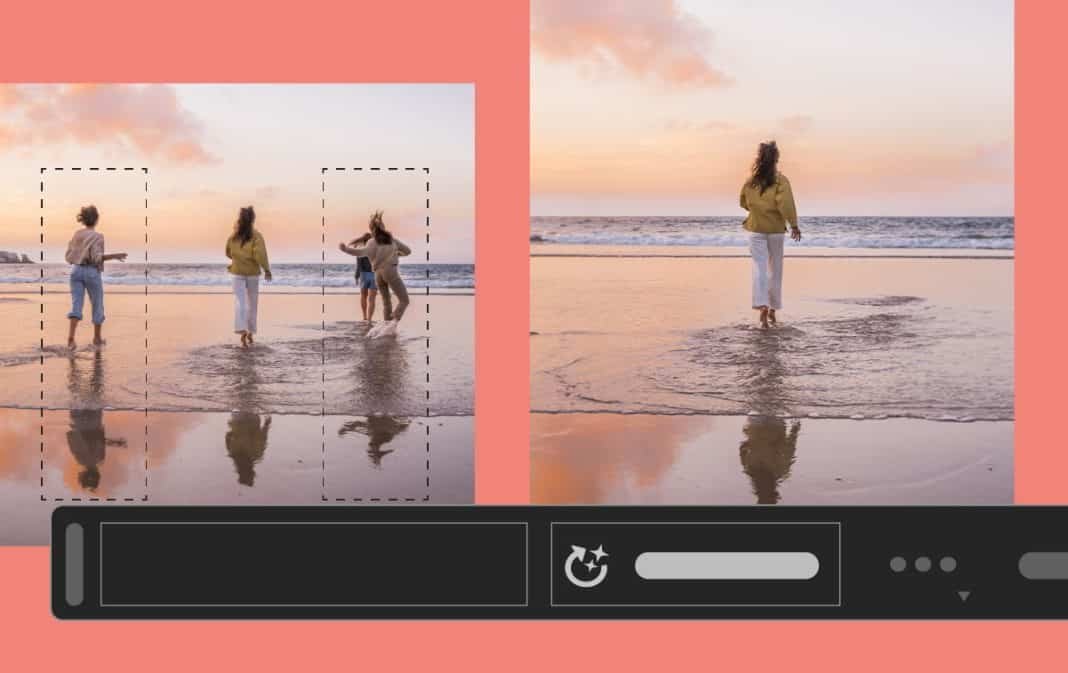
8. Precision Matters: Mastering Your Selections
The quality and accuracy of your selection directly impact Generative Fill's ability to understand your intent and generate appropriate content. A poorly defined selection can lead to blurry, mismatched, or nonsensical results.
How to Improve Selections:
- Use the Right Tool:
- Quick Selection Tool (W): Great for selecting complex, irregular areas.
- Object Selection Tool (W): Excellent for automatically selecting distinct objects.
- Lasso Tool (L) / Polygonal Lasso Tool: Best for free-form or straight-edged selections.
- Marquee Tools (M): Ideal for perfect geometric shapes.
- Refine Edges: After making an initial selection, use
Select > Select and Mask(orRefine Edgein older versions) to fine-tune the boundaries. This is especially critical for intricate details like hair or fur, ensuring a clean blend. - Feathering: A slight feather (1-3 pixels) can help blend the generated content more smoothly with the existing image, but too much can lead to blurriness.
- Content-Aware Selection: When removing objects, try to select slightly outside the object's boundaries to give Generative Fill more context to work with.
9. Calling Home: Network and Connectivity Checks
Since Generative Fill leverages cloud-based AI, a stable internet connection is not just important—it's essential. If your internet is spotty, slow, or blocked, Generative Fill will struggle or fail outright.
How to Troubleshoot Network Issues:
- Verify Connection: Open a web browser and check if you can access various websites reliably. Run a speed test (e.g., speedtest.net) to ensure your upload and download speeds are adequate.
- Temporary VPN/Firewall Disable: VPNs and aggressive firewall settings can sometimes interfere with Photoshop's ability to connect to Adobe's servers. Temporarily disable them and try Generative Fill again. If it works, you'll need to configure your VPN/firewall to allow Photoshop's connections.
- Router/Modem Restart: A simple restart of your home network equipment can resolve temporary connectivity issues.
- Check Adobe Server Status: Occasionally, Adobe's servers might experience outages. You can check Adobe's official status page or look for community reports on social media.
10. When All Else Fails: The Clean Reinstallation of Photoshop
If you've tried all the above steps and Generative Fill still isn't cooperating, a corrupted Photoshop installation might be the culprit. A clean reinstallation ensures all files are fresh and correctly configured.
How to Perform a Clean Reinstallation:
- Uninstall Photoshop: Open the Adobe Creative Cloud desktop application. Go to the "Apps" section, find Photoshop, click the three-dot icon next to it, and select "Uninstall."
- Restart Computer: After uninstalling, restart your computer. This helps clear any residual files or processes.
- Reinstall Photoshop: Open the Creative Cloud app again, find Photoshop in the "All Apps" section, and click "Install."
- Test Generative Fill: Once reinstalled, open Photoshop and immediately test Generative Fill. Do not transfer old preference files or plugins until you've confirmed the basic functionality.
This is often the ultimate solution for stubborn issues that can't be traced to a specific setting or hardware component.
Beyond the Fixes: Optimizing Your Generative Fill Workflow
Getting Generative Fill to work is one thing; mastering it for optimal results is another. Here are a few expert tips to enhance your experience:
- Start with High-Resolution Images: Generative Fill performs significantly better with high-resolution source images. Lower-res images can lead to pixelated, unnatural, or simply lower-quality generated content. Give the AI more data to work with!
- Experiment with Textual Descriptions: Don't be afraid to try different prompts. A single word can yield drastically different results than a detailed sentence. If "red flowers" doesn't work, try "a cluster of vibrant crimson roses" or "delicate red blossoms." The more descriptive and specific you are, the better the AI can understand your vision.
- Patience is a Virtue: Generative Fill is a complex, resource-intensive process. Depending on your system, image size, and network speed, it can take anywhere from a few seconds to several minutes to generate content. Avoid canceling mid-process unless absolutely necessary, and ensure your system isn't bogged down by other demanding applications.
- Learn from the Community: The Adobe Support Community and various online forums (like Reddit's r/photoshop or specialized AI art communities) are treasure troves of information. Users often share their unique challenges, workarounds, and innovative uses for Generative Fill. Learning from others' experiences can save you hours of troubleshooting.
- One Generation at a Time: While you can generate multiple variations, focus on getting one good generation first. If you're creating complex scenes, break them down into smaller Generative Fill steps rather than trying to achieve everything in one go.
Common Questions & Quick Answers
Q: Why does Generative Fill disappear sometimes?
A: It often disappears if you don't have an active selection, are on an incompatible layer (like a Smart Object or Adjustment Layer), or if Photoshop is experiencing a minor glitch. Try making a new selection or restarting Photoshop.
Q: Can I use Generative Fill offline?
A: No, Generative Fill requires an active internet connection to communicate with Adobe's cloud-based AI servers. It cannot function offline.
Q: My Generative Fill is very slow. What can I do?
A: Check your RAM (aim for 32GB+), ensure your GPU drivers are updated and enabled in Photoshop preferences, clear Photoshop's cache, and verify you have a stable and fast internet connection. Using smaller file sizes temporarily can also help diagnose if it's a performance bottleneck.
Q: Is there a limit to how much I can use Generative Fill?
A: Yes, Adobe's terms of service for Generative Fill typically include "Generative Credits" that replenish monthly. Exceeding these might temporarily restrict usage, though details can vary by subscription plan.
Your Next Steps for AI-Powered Creativity
Troubleshooting Generative Fill can feel like detective work, but by systematically checking off these common issues, you'll significantly increase your chances of success. Most problems boil down to system requirements, software updates, or connectivity. By ensuring your Photoshop environment is optimized and you're using the feature correctly, you'll unlock the full potential of AI-powered image editing.
Don't let a minor technical hiccup stand between you and groundbreaking creative possibilities. Take these steps, be patient, and prepare to be amazed at what Generative Fill can do for your images. Happy creating!